Twilight – Wallet Guide
This guide explains how to manage user funds in the Wallet section of the Twilight frontend. The wallet interface supports fund transfers across Funding and Trading accounts, enabling users to interact with the Inverse BTC perpetual exchange in a private and secure manner.
Overview
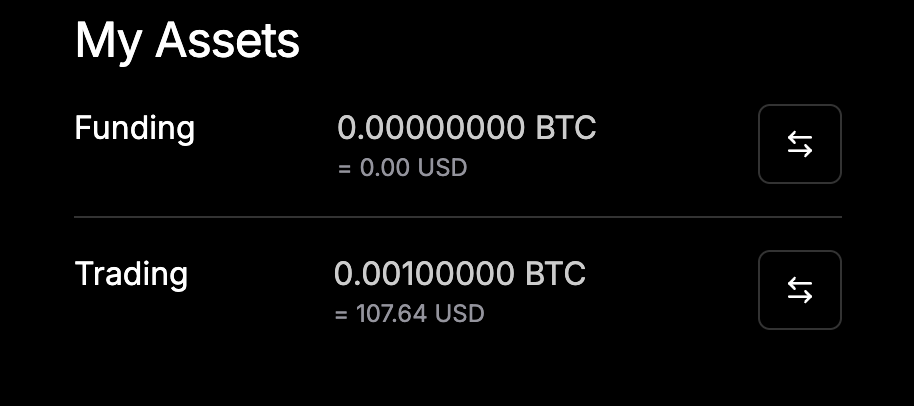
- Funding Account: A standard Twilight Testnet chain account. This account is visible on-chain and used for receiving assets (e.g., via faucet).
- Trading Account (Dark Account): A privacy-preserving account containing encrypted balances. These are required to open private perpetual positions.
All operations are executed on the Twilight testnet and can be viewed on the Twilight Testnet Explorer, though the data is encrypted.
Prerequisites
This guide assumes you already have a Keplr wallet connected to the Twilight testnet and a small balance of NYKS (gas) and SATS (test BTC balance) available.
If not, follow the step-by-step Connect your Keplr guide and visit the Faucet to obtain test tokens, then return here.
Account Types
1. Funding Account
- Your public account on the Twilight Testnet chain.
- Initial NYKS token and BTC balance are received here.
- Supports transfers to Trading (dark) accounts.
2. Trading Accounts (Dark Accounts)
- Encrypted accounts used to interact with the Twilight.
- Each trade must be performed from a dedicated trading account.
- Users can create multiple dark accounts as needed.
Transfers Supported
🔁 1. Funding → Trading
Transfer funds from a Funding Account to a Trading (dark) Account.
Steps:
-
Click the Transfer ⇌ icon button next to your Funding Account.
-
In the dialog:
-
Select a destination Trading Account. The destination account must have a zero balance. If you don't have any zero-balance accounts available, you'll need to create a new one
-
To create a new account, select "Create new account" from the dropdown menu
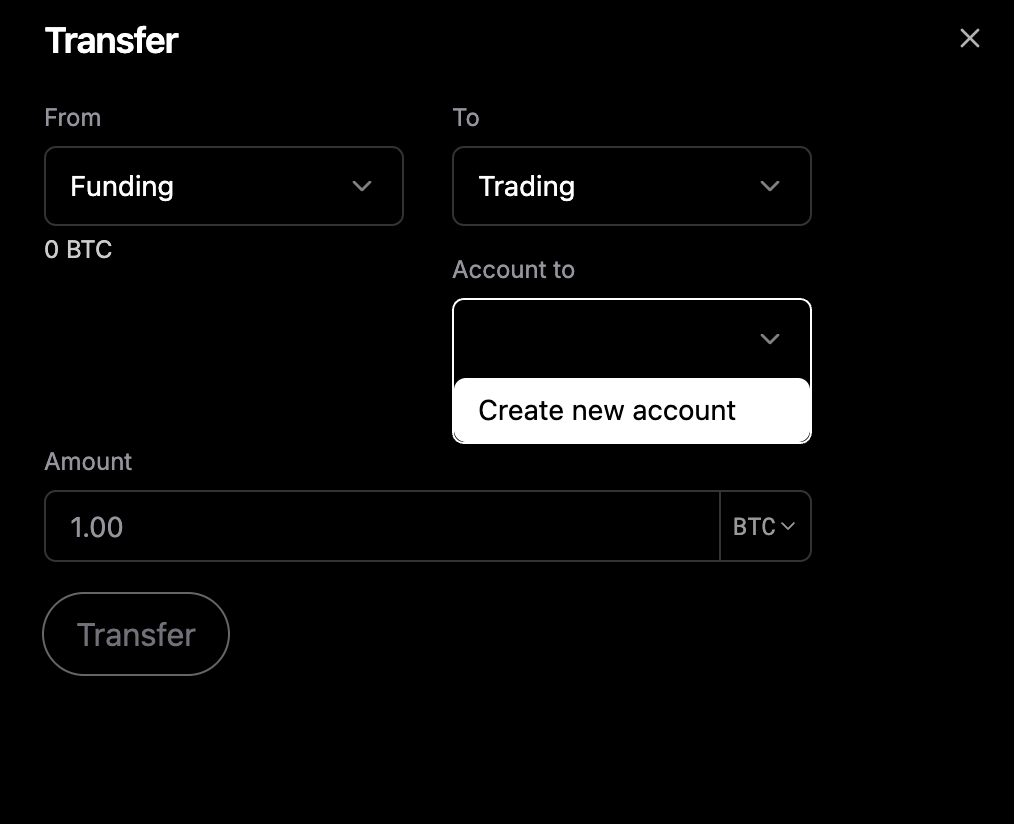 This will create a new dark account with default tag.
 -
For custom tags and subaccount management, see the Create Subaccounts section
-
-
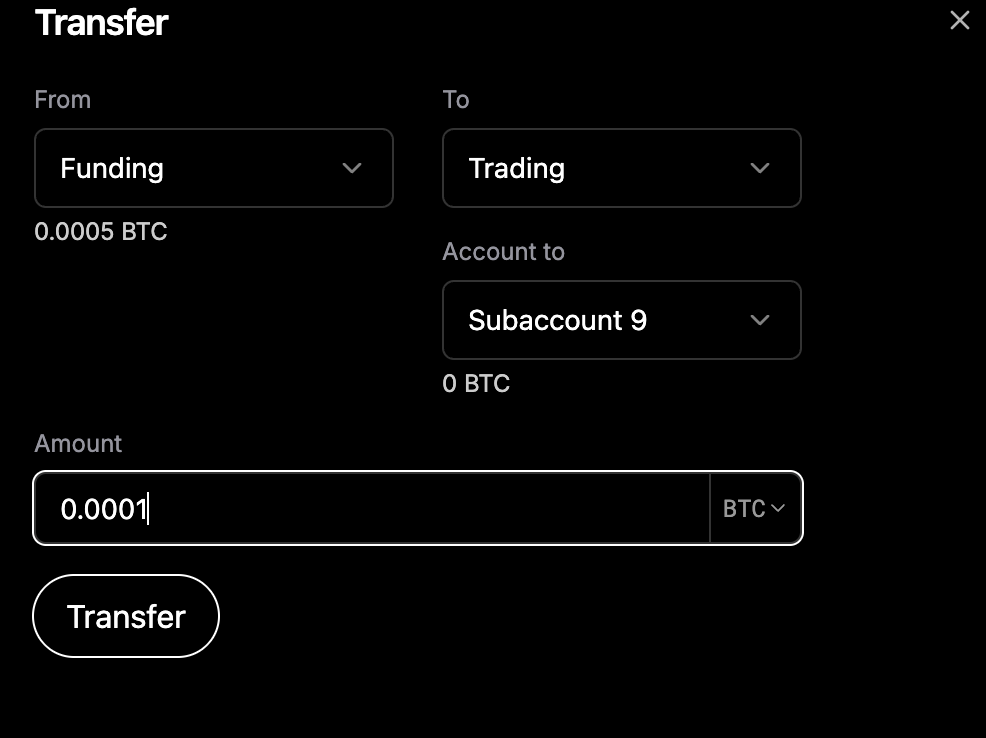
Enter the amount to transfer.
-
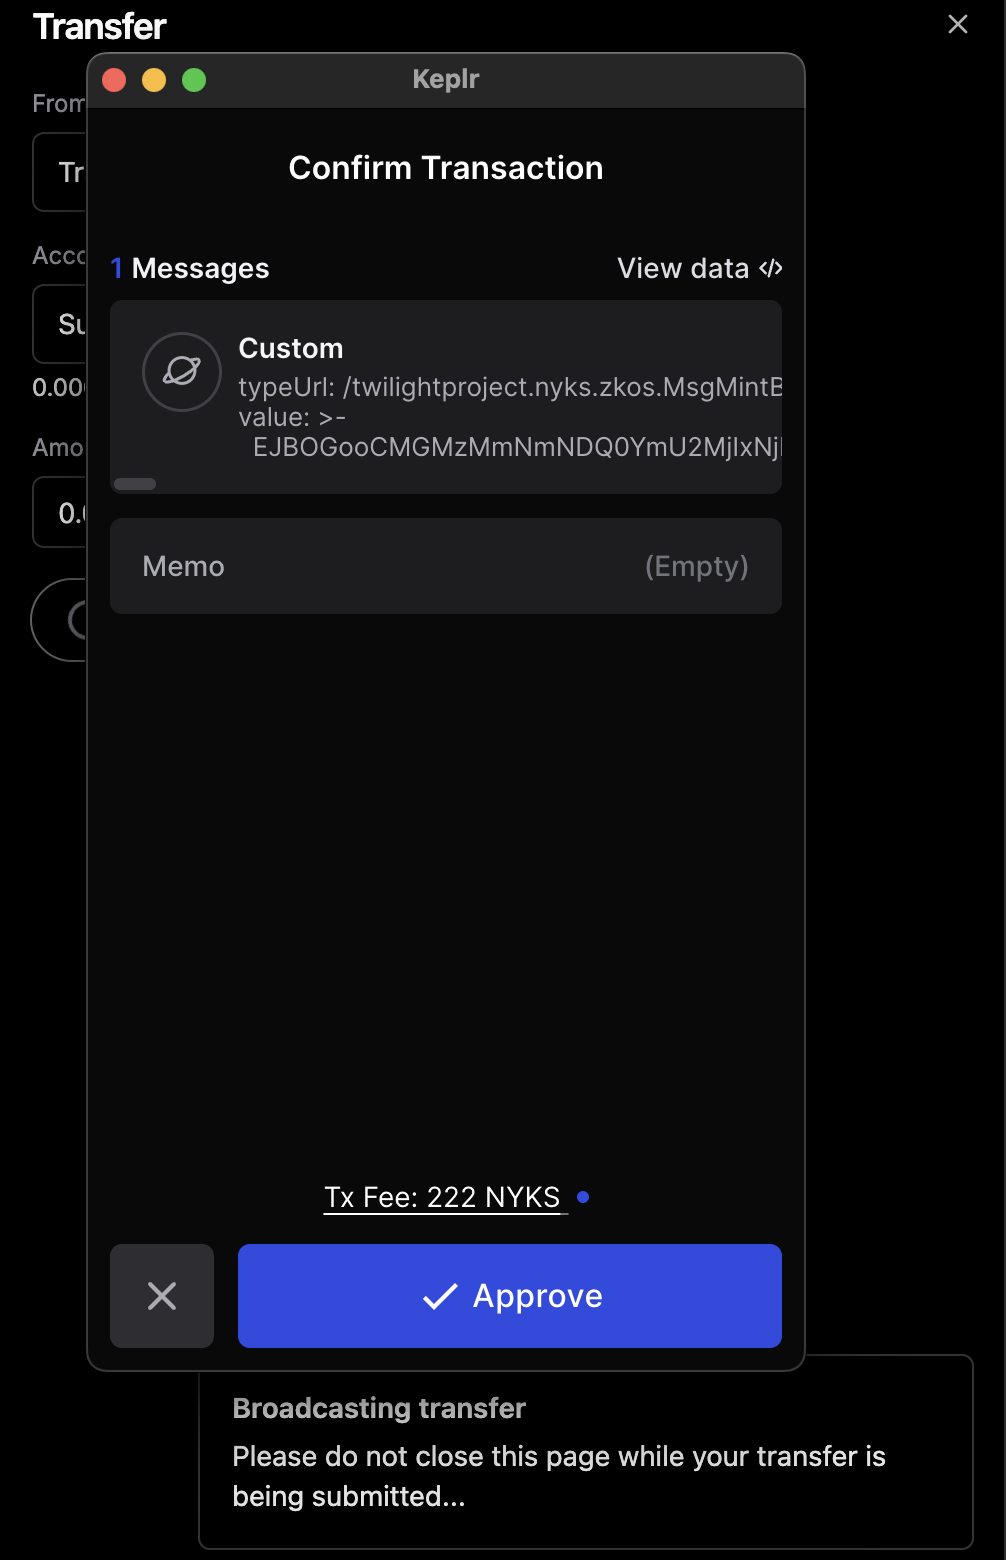
Click Transfer and sign the transaction.
 _
_ -
The selected Trading Account will be updated with the transferred BTC balance.
-
You can view your transaction details in the Account History section

⚠️ A Trading Account must have zero balance before receiving a new transfer.
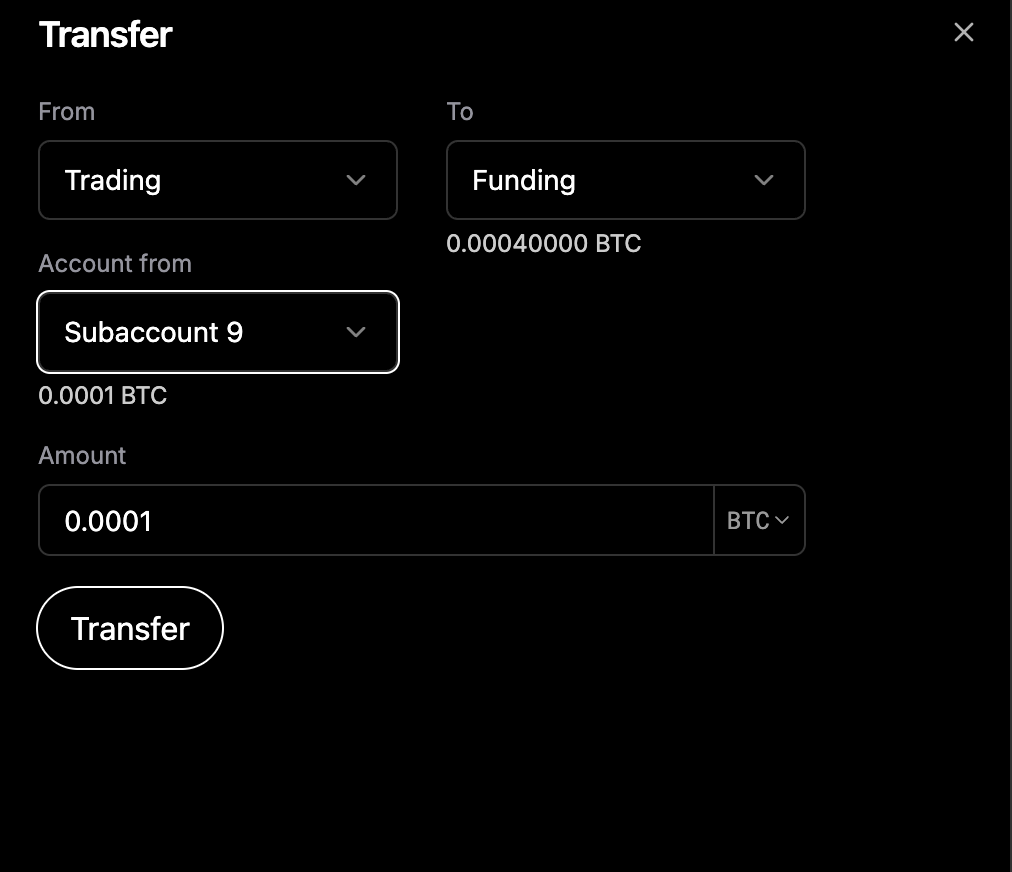
🔄 2. Trading → Funding Transfer
Move funds from a Trading Account (dark account) back to the public Funding Account on the Twilight Testnet chain.
Steps:
-
Click the Transfer ⇌ icon next to the Trading Account.
-
In the transfer dialog:
- Set "Trading" as the source.
- Set "Funding" as the destination.
- Choose the source Trading Account from the dropdown.
-
The full balance of the selected Trading Account will be automatically populated for transfer.
-
Click Transfer, then review and sign the transaction.
-
Upon confirmation, the transferred BTC amount will be reflected in your Funding Account.
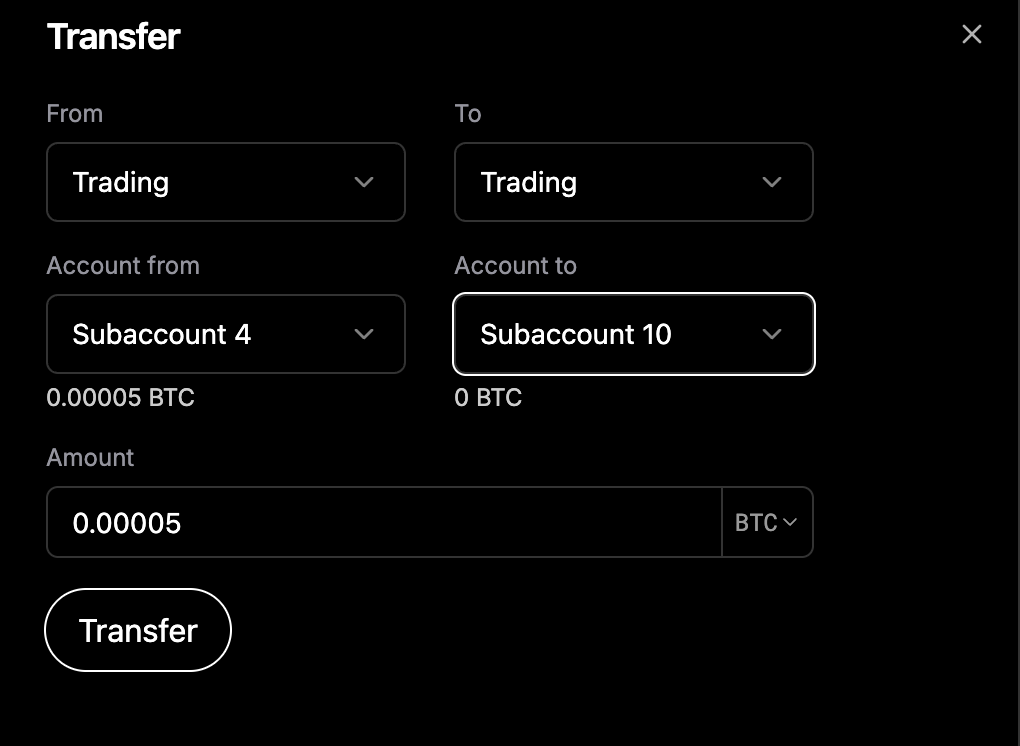
🔁 3. Trading → Trading
Transfer funds between two Trading (dark) Accounts.
Steps:
-
Click the Transfer ⇌ icon next to the Trading Account
-
In the transfer dialog:
- Set "Trading" as the source.
- Set "Trading" as the destination.
-
Choose the source Trading Account from the dropdown
-
Choose a destination Trading Account with zero balance.
- Create a new one if needed using Create new account.
- Create a new one if needed using Create new account.
-
Review the data and Click Transfer.
-
Upon confirmation, the full balance will appear in the destination Trading Account.
Notes:
- Only full-balance transfers are supported.
- Typically used to move funds from a settled position into a fresh Trading Account for reuse.
- Each Trading Account supports only a single order. After an order is executed, you must transfer the balance to a new Trading Account before placing another order. This maintains clear account tracking and settlements.
Reminder:
Set up multiple Trading Accounts in advance if you plan to place consecutive orders.
Create Subaccounts
It is recommended to create a separate Subaccount for each trade, as accounts with active positions become locked and cannot be reused until the position is closed. While order interactions can also be performed using the default "Trading Account," using dedicated Subaccounts provides better flexibility and fund management.
-
Navigate to the Homepage.
-
Connect your Keplr wallet by clicking the Connect Wallet in the top-right corner of the navigation bar.
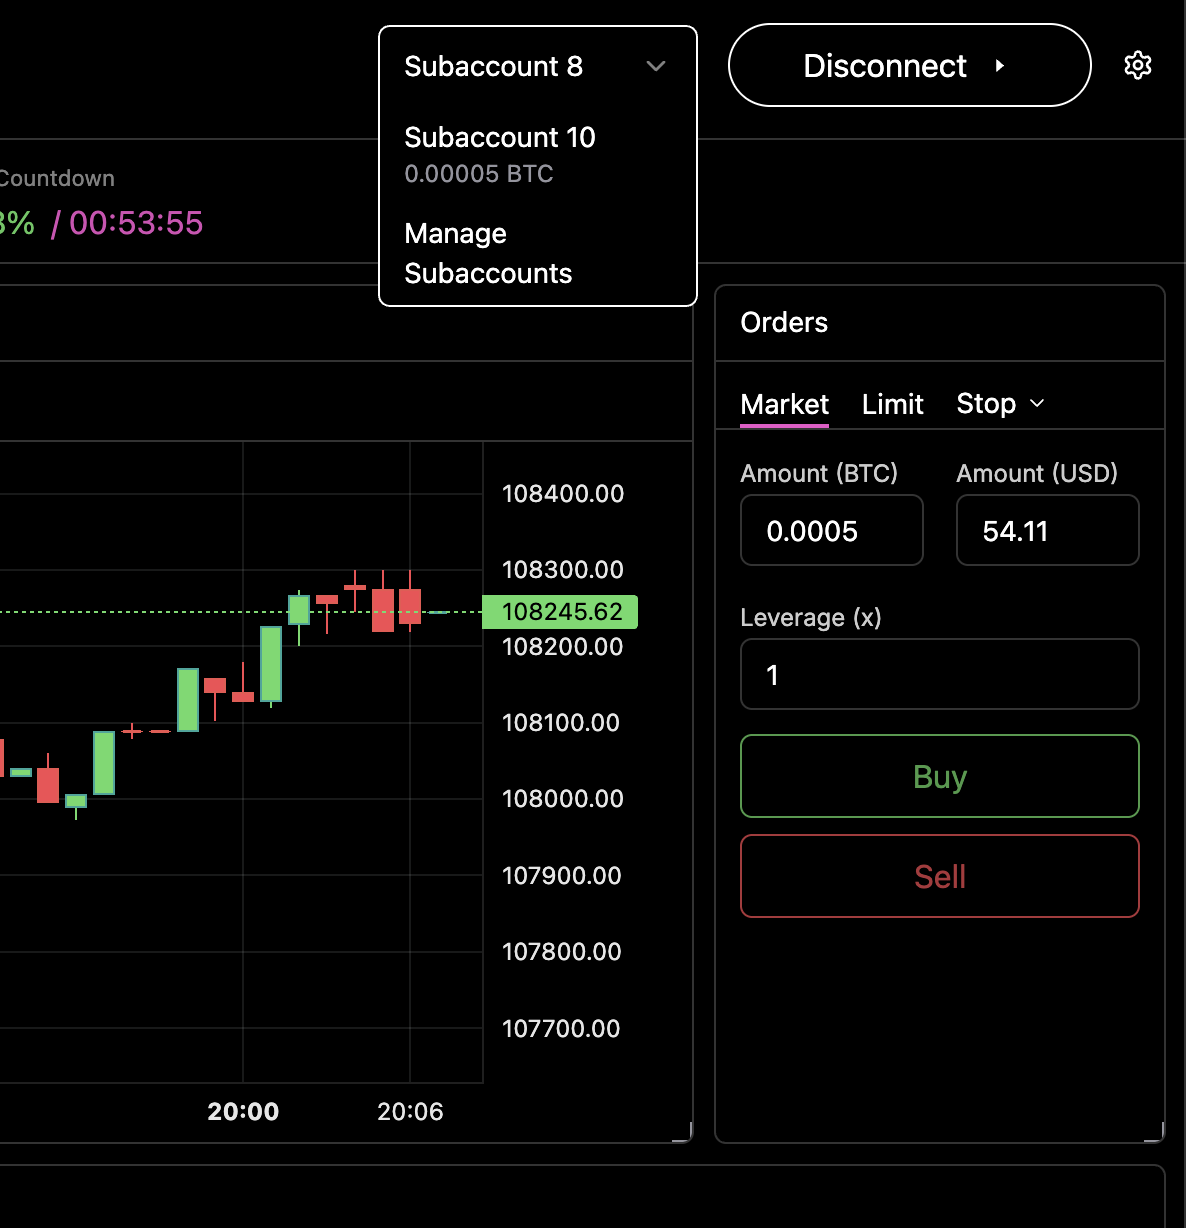
-
Once connected, open the Trading Account dropdown and select "Manage Subaccounts".
-
In the Subaccount Management view, click on "New*" to create a new Subaccount.
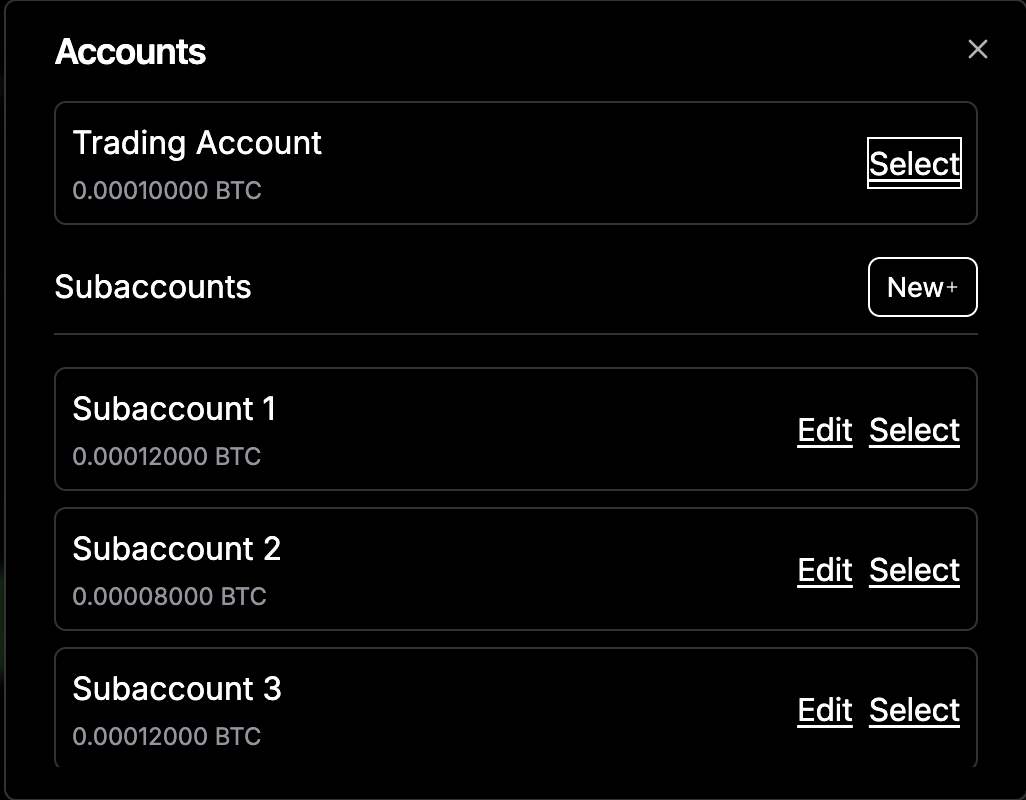
-
Enter a custom name for your Subaccount and click "Create" to finalize the process.

Once the Subaccount is created, it will be available for use in the Funding → Trading and Trading → Trading transfer flow.
Additional Information
- Transactions can be viewed on the Twilight Explorer, but amounts and account details are obfuscated for privacy.